We have updated our menus to make them more intuitive and added some new options.
Some things haven’t changed:
Our main screen is still the Search Contacts option, and this is still it’s own item on the root menu
Clicking on your organisation name will show you a list of the organisations you have access to and let you add a new one
Logout will still do just that!
There have been no other changes to the way things work – they are just in a new place. The most significant change is that the Collection History screen is now under the Reports menu and the Process Now function is now under the Actions menu.
Here’s a run down of the other menu options:
Edit
User Profile – change your user name, email address or password
Organsation Settings – available to admin users only – change your organisation settings, billing options, users and gateways
Actions
Process Now – activates the collection routine now – was previously on the Collection History screen (same as the Generate Now button)
Reload Data – reloads data from the accounting system – was previously on the Search Contacts page
Reports
Collection History – view the past collection batches and drill into the batch detail
Installments – see a list of upcoming installments (was previously underneath the Collection History table)
Help
Help for this page
Knowledge Base
Contact Us
We know that any navigational change can be disorienting at first, but bear with us. It will become second nature in no time. This change in menus prepares us for some new options coming soon!
We’ve just released our updated Contact an Invoice dialog box. What was previously two separate dialogs (one for the contact and one for the invoice) has now been combined into one tabbed dialog so that you can more easily move between the data you need to manage for each contact.
Plus, we have also added a history tab, so you can see the collection history for each contact in one easy place – something that you couldn’t do before.
We’ve also added a nifty variation to the suspend setting. Rather than just having the contact suspended or not suspended, you can now choose “Installments only.” This allows you to suspend automatic collection on all invoices unless an installment has been created for the contact. This gives you a bit more control.
We have more changes to come in this space, so if you have any feedback on how it works please contact support.
So here’s a quick run down of each tab:
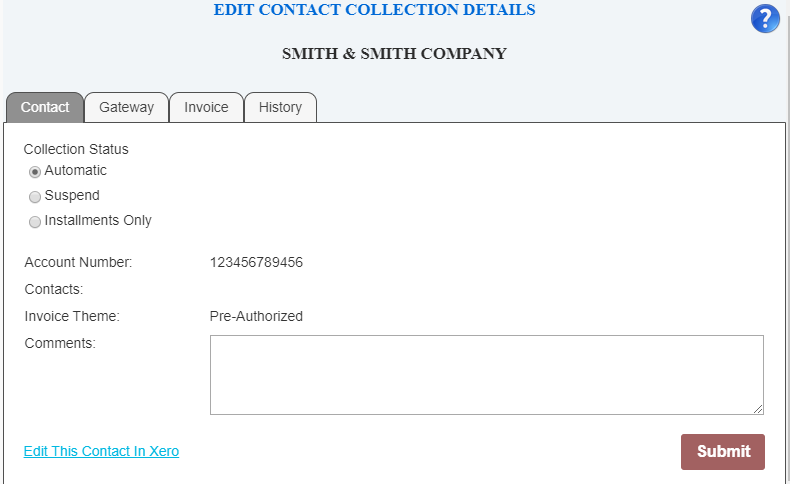
Contact
Shows read-only details from your contact settings in the accounting system, allows you to store a comment, and sets the collection status for the contact to one of the following:
Automatic – all invoices will be collected when the automatic routine or Process Now is run.
Suspend – no invoices will be collected for this contact
Installments Only – only invoices with an installment plan established (can be a single installment) will be collected – all others will be ignored.
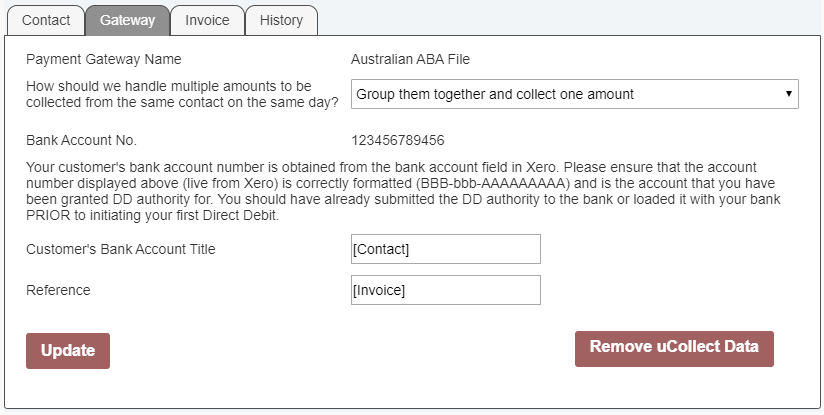
Gateway
This tab holds all the data about how payments will be processed. This is where you assign the contact to a gateway and make the gateway-specific settings. Some gateways allow additional information to be included. You can use “[Contact]” (without the quotes) to include the contact’s name and “[Invoice]” to include the invoice number (if there is more than one we will add ” etc” after the first one. Some gateways have limits on the number of characters here so if you get errors you may need to keep this shorter.
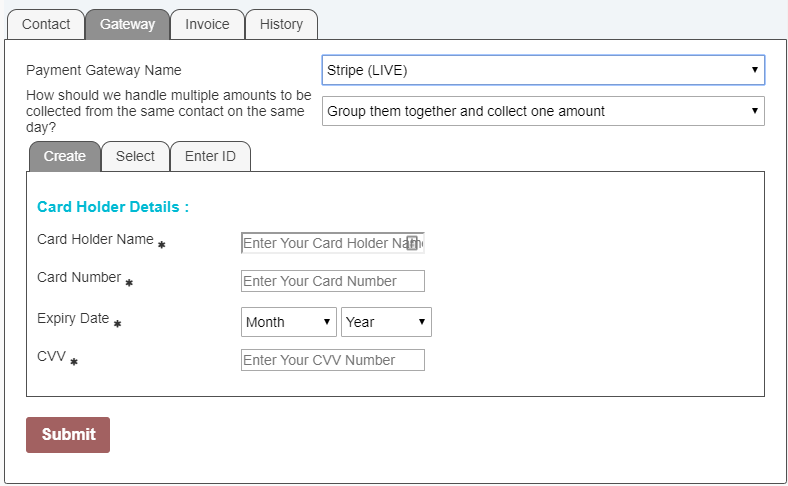
If this is a credit card gateway you will be able to add the card information here, choose from a list of existing contacts or manually enter the customer reference from your gateway (not all gateways offer this option).
Also on this tab you can tell uCollect whether to combine invoices into a single payment or keep them separate. The default is set in the gateway definition, but you can change it for each contact here.
Finally, you can remove the gateway assignment by clicking “Remove uCollect Data.” Once confirmed uCollect will no longer monitor this contact and no contact data is retained by uCollect.
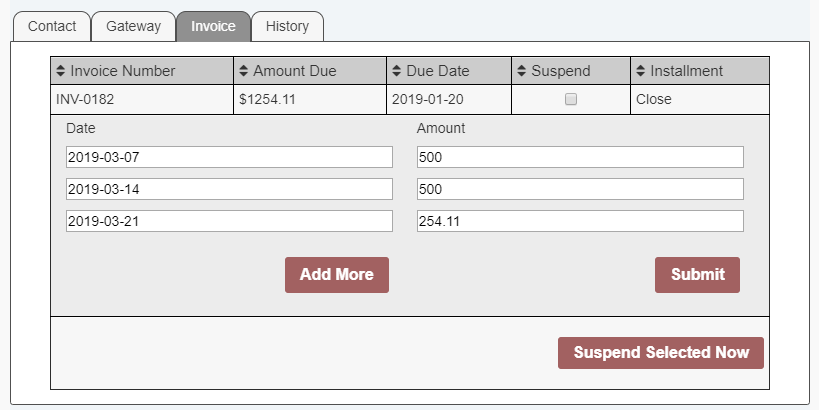
Invoice
This tab will list all unpaid invoices from the accounting system. On this tab you can suspend or un-suspend any individual invoice or add installments to any invoice.
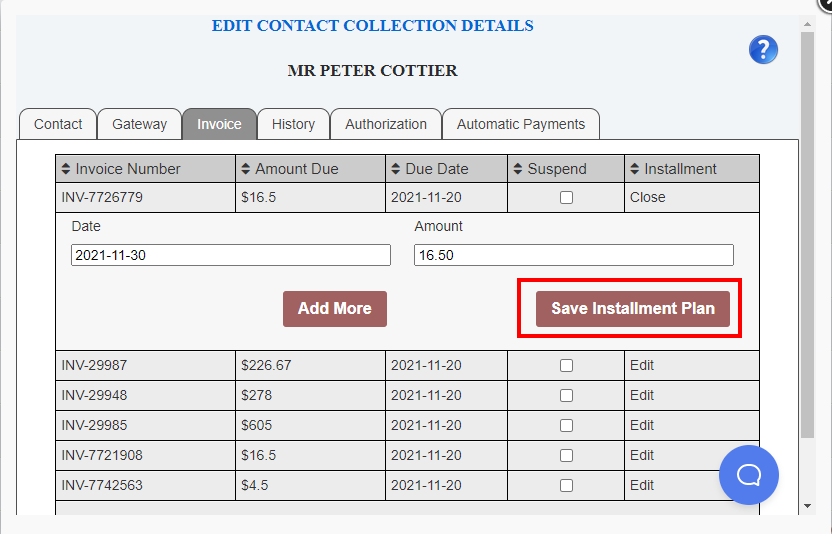
When adding installments you need to choose a date and an amount for each installment. You can remove an installment by changing the amount to zero. While there is no minimum or maximum number of installments, you can only save the installment plan if the total of the installments agrees with the amount due (or is zero).
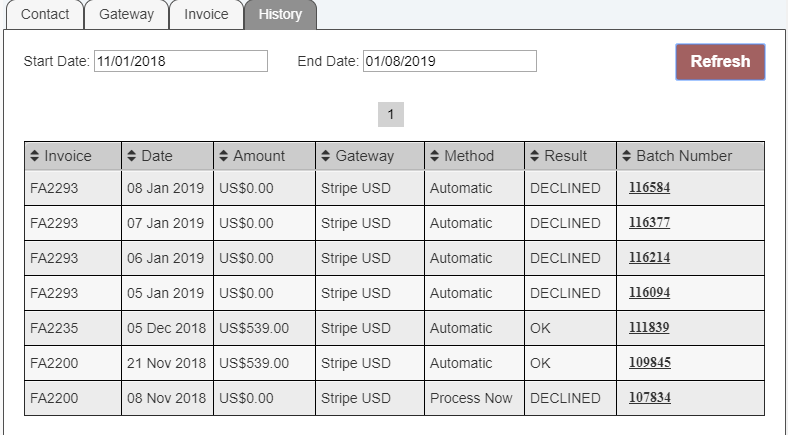
History
The History tab allows you to see recent transactions for this contact. By default the last 3 months activity is shown, paginated if the list is too long. But you can use the date pickers to change the date range. You can click on the Batch Number to see the whole batch which may give more useful information.
In order to protect you from accidentally double-collecting any of your customer’s invoices (this can easily happen if a payment is removed from the accounting records and not re-created immediately) we have now implemented two new tests to detect and prevent us from collecting an invoice more than once.
If we have previously made a successful collection on the same invoice number (we don’t consider installments here) then we will fail the collection before it is sent to the gateway (this includes being included in an upload file).
If the invoice creation date (this is not the same as the invoice date or the due date) is more than 6 months in the past then we will also fail the collection (this is because we only keep payment history for 6 months, so if an invoice is more than 6 months old we will not be able to properly identify any duplicate payments in the first test.
Please note that these tests are not performed in a Pay Now transaction.
If an invoice fails one of these tests we won’t collect it. The invoice will be suspended and you will receive an email alerting you to this error. You can override this test for any invoice by creating an installment plan. Installments always ignore the due date, amount due and prior collection data and will collect according to the collection until the invoice is fully paid. It is possible to set up an installment plan with a single installment in it which will allow the invoice to be processed. To set up an installment plan follow these instructions from within uCollect:
Find the contact in the Search Contact Screen (check that it is assigned to a gateway)
Click the blue invoice total amount
Find the invoice and ensure that the suspend check-box is not check (uncheck it if it is)
Click the “Add” (or “Edit”) link at the right of the invoice
Enter the date and amount of each installment (you can have one or more installments; the total of the installments MUST equal the amount due)
Click the “Save Installment Plan” button
You can now close the Invoice list window (click the green “Suspend Selected Now” button if you have changed any of the suspend check-boxes).
We realise that this can be cumbersome if you have lots of transactions to correct. To make this process easier we are giving you a simple way to override both tests as needed.
This option is only available in the Process Now screen. When you run Process Now you can check the box to the right of each batch to include 6 month old invoices and (for upload gateways only) include previously processed invoices. So if you get an error message on items we recommend that you go to Process Now and run a new batch to include the items previously excluded. This setting applies to ALL transaction in the batch. If there are items that you do NOT want to re-process you should suspend them prior to running the batch. For your safety you must select these options each time you require them – there is no way to switch them on permanently.
This option is not available in the automatic routine – it will always reject 6m old invoices and invoices that we have previously collected. To include an invoice in your automatic batch that is older than 6 months or that has previously been collected you must set up an installment. Upload batches always use Process Now, so you will always have the option to include when you click the Generate Now or Process Now buttons.
Please note that using these options can result in unintended collections. We recommend that you process your batch normally despite these errors. Then review the error list and decide if any of these items should not be processed and suspend them (you can do this from the Process Now screen by clicking on the batch total and then selecting the invoices that you want suspended). Now it is safe to run Process Now with either of these options checked.
If you have processed an upload batch and want to completely redo it please contact us. We can delete the entire batch from the database which will eliminate the first type of error. If you remove and redo payments in Xero and then re-generate the batch you WILL get the prior-processed error. We either need to remove the dead batch from the database or you need to allow reprocessing when you re-generate the batch.
We recently released an update to our Stripe integration. While the changes are generally invisible to the user they do help improve security and the sign-up process. We are now using Stripe Connect to authenticate your Stripe Account (rather than the old method of having to locate your API keys) as well as stripe.js which is a more secure method of collecting credit card data and transmitting it between our pages and your Stripe account.