Most Common Support Issues
Creating a new organisation requires three basic steps.
Step 1a: Connect uCollect to your Xero/Qucikbooks ledger
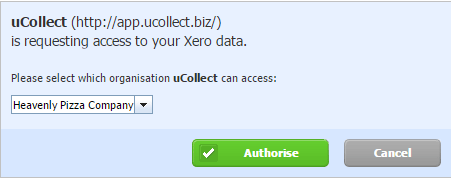
Each uCollect account must be connected to a Xero/Quickbooks ledger. Just click on the “Connect to Xero/Quickbooks” button, log in to Xero/Quickbooks (if necessary), and choose the Xero/Quickbooks ledger to connect to and click “Authorise.”

When choosing your Xero/Quickbooks ledger you must have standard or advisor rights to the ledger. If someone already has created a uCollect account for the ledger you select then you will receive a warning and can send notification to that other person (for privacy reasons we can’t tell you who the other person is). Also, we do not connect to partner-only editions of Xero/Quickbooks (such as Cashbook or Ledger) as these do not have the Invoice functionality.
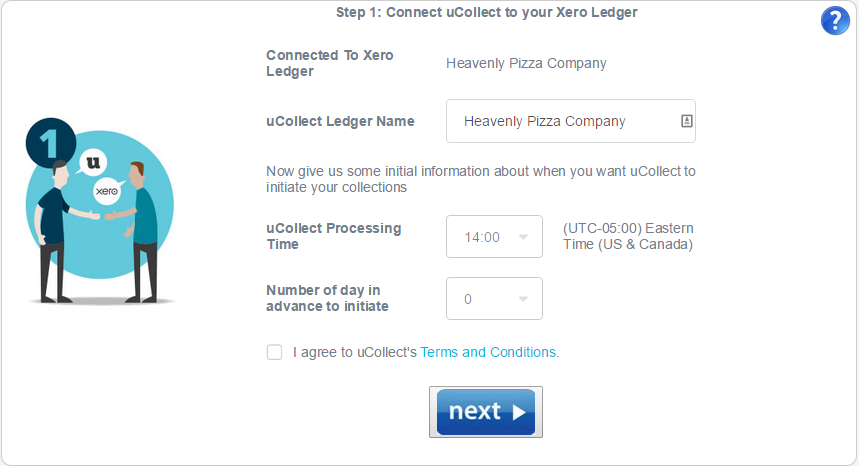
Once you have authorised uCollect to connect to your ledger you will be returned to uCollect where you will need to enter a few more details about your ledger.

uCollect Ledger Name: You can change the name that is shown in uCollect if you need to. It will default to the organisation’s legal name from the Xero/Quickbooks ledger.
uCollect Processing Time: This is the time that uCollect will access you ledger every day, based upon the time zone of your XeroQuickbooks ledger. If your time zone is incorrect you should log into Xero/Quickbooks and change that in your Financial Settings. We recommend that you set the processing time to be at least 2 hours prior to the end of your working day or the cut-off time for your payment gateway. For example, if your bank cuts off at 4pm, then you should choose 14:00 (2pm) as the processing time.
Number of days in advance to initiate: You can choose the number of days in advance that you want to initiate collection transactions. If you have upload gateways (where you have to download a CSV file from uCollect and upload it to your bank) then we recommend setting this to at least 1 day in advance. Same day processing is possible, but only recommended for direct gateway types.
Sales Tax: If you are in a region that we may need to charge sales tax on we will ask you for more information on this screen. Right now we only have to add GST/HST if your are in Canada.
You can change these settings at any time by clicking “Edit Organisation” in the navigation bar. When you click “Next” from here you go to the final stage in this step, which is to setup your uCollect subscription.
Step 1b: Set your uCollect Subscription

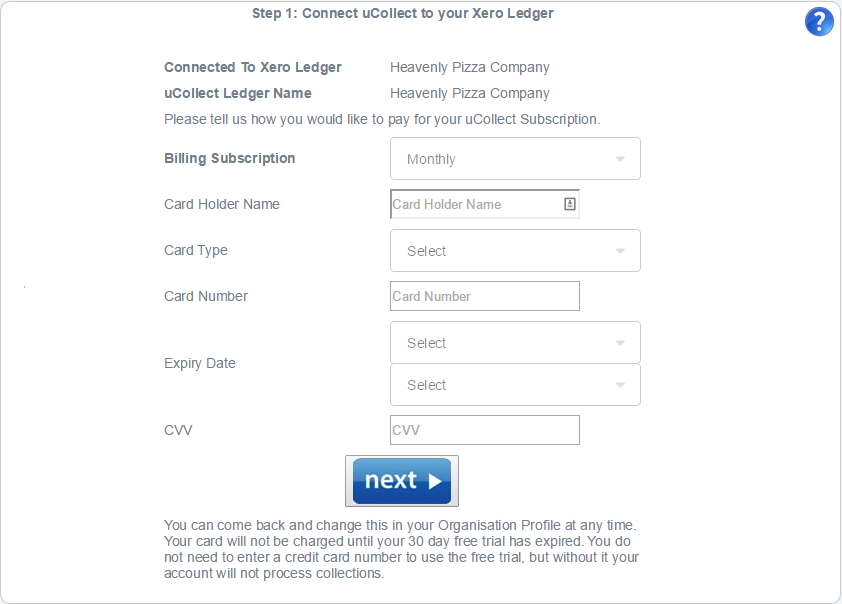
Simply select your subscription term (monthly, annual or two years) and enter your credit card details. We validate your card details but do not charge your card at this stage. You have an automatic 30 day free trial. We will send you an email 5 days before we charge your card every time.
You do not need to enter credit card billing details to start the free trial, but without a valid credit card uCollect will not process any collections. You will see a message “Your Account is on Hold” on the screen until you enter a valid card.
Step 2: Connect uCollect to a Payment Gateway
If you don’t know which gateway to choose we recommend that you choose “Manual CSV” – you can always change later.

See the Payment Gateway help page for assistance on the settings for the gateway.
Step 3: Tell uCollect what contacts to collect from
You have now successfully created your uCollect organisation. The final step is to tell uCollect which contacts to automatically initiate collection requests from. Please see the Search Contacts help page for more information on this step.
