Most Common Support Issues
Send Invite
The Invitation feature allows you to send an email to a client and “invite” them to set up their payment details for automatic collection. It differs from a Pay Now link/request in the following ways:
- You do not have to have an invoice for the contact to be able to send an Invite
- The contact can not select which invoice to pay – their only option is to “Pay all invoices on their due date automatically…”
- You have more control over which gateway to invite the contact to use (if you have more than one).
Setting up the Invite Feature
To use the Invite feature you must have gateways that are eligible for Pay Now. In the gateway definition (in the Pay Now settings) you need to have chosen any option other than “One-off Payments only.”
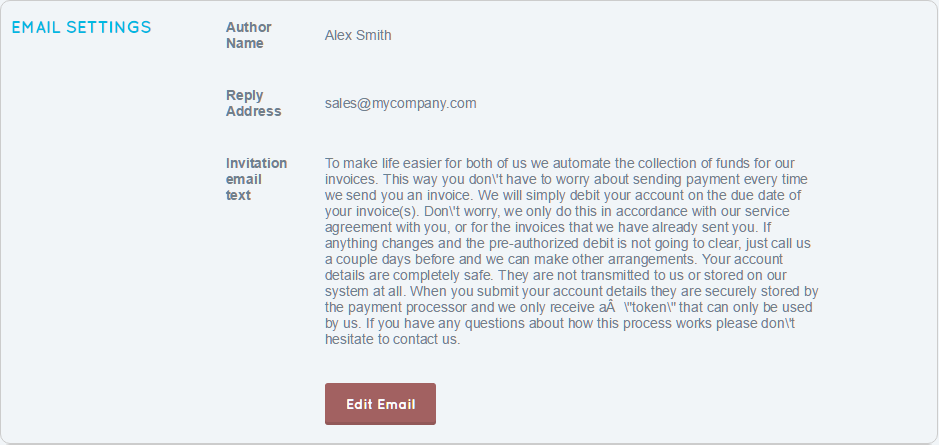
Next, you should preview your Email settings under “Edit Organisation.” This contains the default invitation settings (sender’s name, reply address and email text). You can edit this to your requirements as necessary.
Sending an Invitation
You send invitations from the Search Contact screen. Beside each contact that is NOT already assigned to a gateway you will see an email icon.

When you click on the email icon you will see the Send Invitation screen. It will be pre-populated with the text from your Email settings.
Options on this page are:
- Email address: this will default to the nominated email address for this contact (if available). You can overwrite this.
- Limit to Gateway: You need to specify which gateway(s) you are inviting the user to sign up for. If you only have one then it will be pre-selected. You don’t need to offer them credit card if you really want them to sign up to Direct Debit/ACH!
- Message: This will default to the text in your organisation’s Email Settings, but you can click “Edit Content” and change this. The data at the bottom of this section (including the link and your name) will be appended to this text.
When you click “Submit” the invitation will be sent to the contact. You will now see in the Search Contacts screen that an invitation has been sent.

What the client sees
The client will receive an email with the text you have sent and a link to the Invite page. It looks just like the the Pay Now screen, but with a few less options.
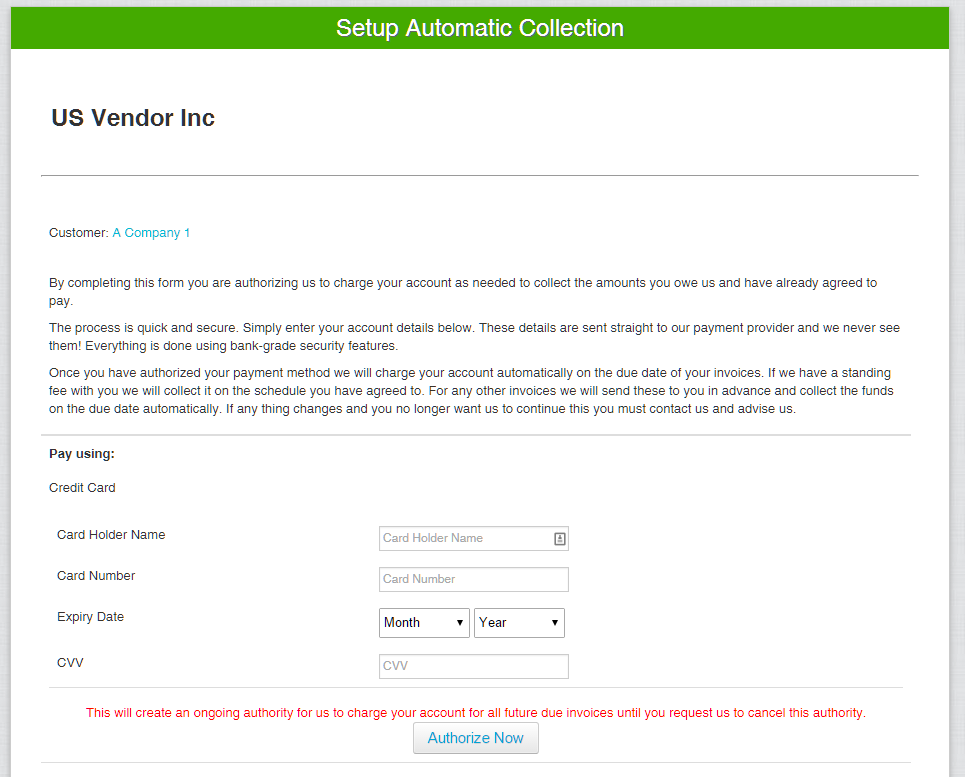
If you listed more than one gateway in the invite settings the contact will be able to choose one. If only one was set then that will be the only option they see.
Once the contact sucessfully completes the Invitation form you will receive an email notifying you that they have signed up (if you have that option set in the gateway settings). You should consider setting a special Branding Theme in Xero/Quickbooks. From this point on uCollect will automatically initiate the collection of funds on the due date of the invoices for this contact.